Character Design - Raelyn
- S.L. Matthews
- Feb 13, 2021
- 7 min read
Updated: Mar 27, 2023

As an author, it's my job to paint a picture for the reader's mind - to add the details necessary to imagine a world, and all the characters within - and immerse them into my own imagination. But sometimes, it's nice to let the painting do the talking for me. As a result, I've always wanted original concept art to complement my work, and to add to the 'depth' of the world of Kel Doran.
In this installment, I'd like to take a moment to discuss a new character to my world. She appeared only as a whisper in Book One, and made an intense, teasing appearance in Book Two. Raelyn, Kurodai Sentinel for the Order of Myrrh, makes her stunning entrance to my series in Book Three, Kingdom of One...and I feel she deserves a proper introduction.
The point of this article isn't to just draw a character, but to develop her, from her weapons to her hairstyle, from armor to clothing, etc. So with that being said, let me introduce you to - Raelyn.
Raelyn's Design
Because Rae's character has been mostly a mystery up to this point in the series, her descriptions in
the books had to mirror that. Her trademark feathered braids, representative of all Kurodai warriors, were mentioned...but little else, short of her exotic accent. So, to bring a character to life, I needed to provide more details.
Since I'm not a professional artist, my first go-to for a character concept is Fiverr. You can find surprisingly good artists, and their rates are incredibly reasonable. It does, however, take quite a bit of time to filter through the 'fluff' and get to the real talent. It can be a fun task for a weekend afternoon, though, if you have time to spare.

I spend a little too much time on Fiverr, and for my efforts, they've rewarded me with a 'spends too much time on Fiverr' badge :) I guess I can't complain too much. They throw a few discounts and incentives my way from time to time...probably to ensure I keep my badge! The best perk, however, is the ability to refer others at a discount. If you've been interested in Fiverr, or want to see what options are out there, click on the banner below and get 20% off your first gig. It's not a lot, but might be enough to bring your first project within reach.

Once I find a designer, the job is on me to provide as much information as I can...otherwise, it's literally their creative ability to piece together a character. If that's the case, the end result is really THEIR character...not yours.
I put together a description in MS Word, along with a few examples and related information. Below is the form I sent to my designer for Rae's initial design, minus a spoiler ;) As you can see, it contains plenty of details, but I also like the artists to have a little freedom in their design. The first example image is a pencil drawing of mine (still not completed), to demonstrate MY opinion of what Raelyn looks like. Second, another Kurodai sentinel I had drawn up...Syndra. This was merely to show the style of character, of what I felt a Kurodai warrior would look like. And finally, a piece of artwork I love, that shows the hair/accessories I would like to see.


Raelyn's First Draft
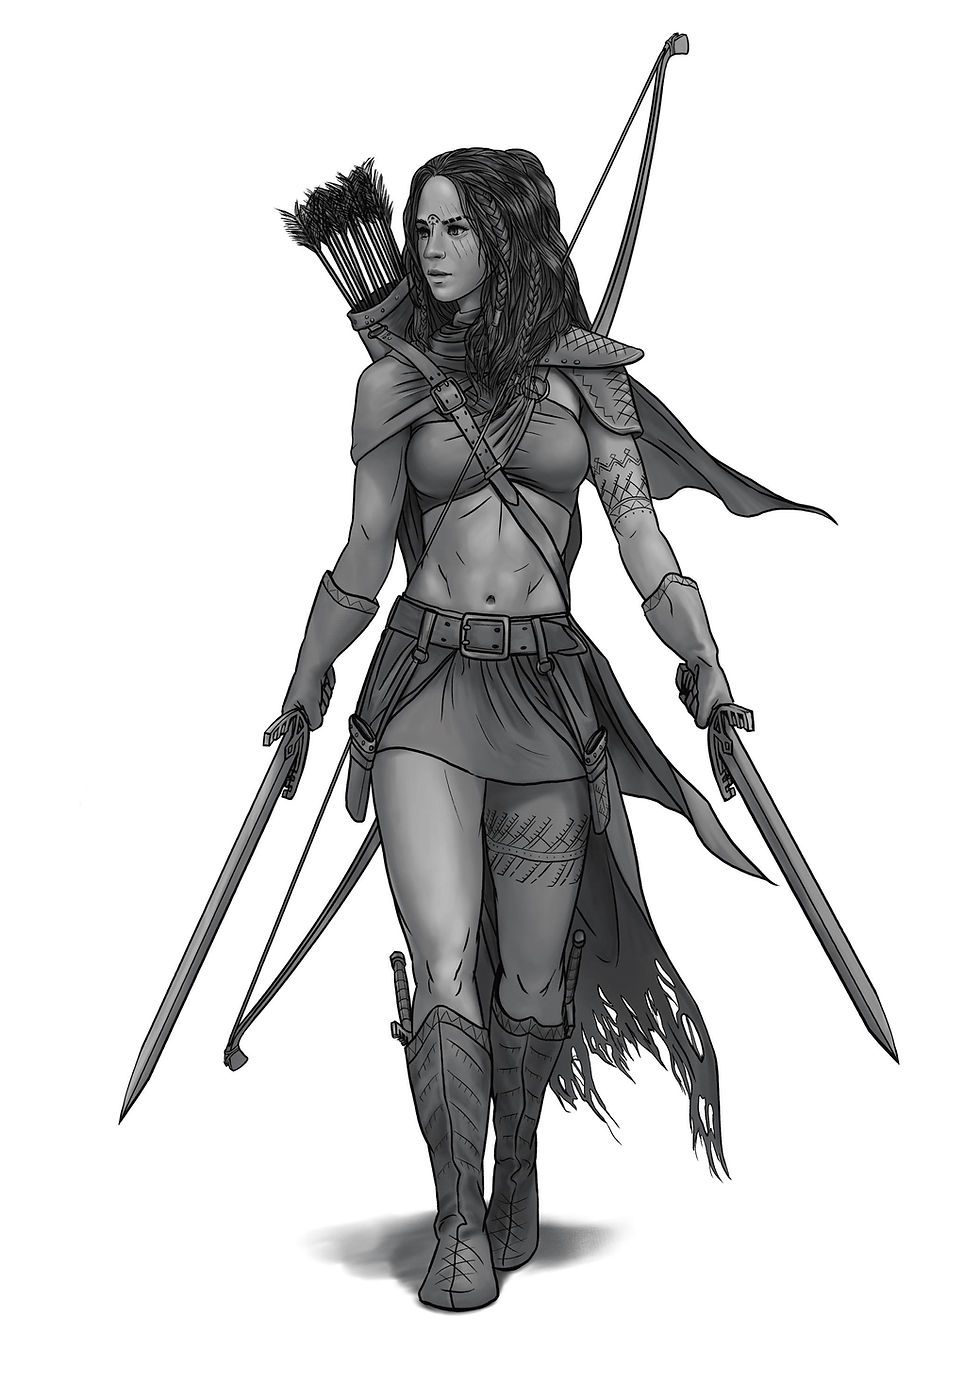
Two days later, I received the artist's first draft. It was really good, in my opinion. It hit all the marks I had laid out for him: light armor, twin blades, braided hair, scarred face. She was a warrior - a pretty intimidating one. My only real issue was her stance was SO similar to Syndra's example, I was worried the two might be confused.
My revision requests were simple - reposition her walking towards the camera, looking off to the side. Also, add a torn cloak around her waist, and another piece on her shoulders. Everything else was either too subtle to mention, or I was already very pleased with.

His second attempt was pretty much perfect. If I had a chance to go over her clothes once more, I'd suggest a few adjustments. But I was so impressed with his vision, I wanted to keep moving forward and see what he could do.
The artist cleaned up the sketch, providing a 'clean line' rendition, then proceeded to add moderate shading to bring out the shadows and add depth to the character.

The results speak for themselves. I can't say enough about Vadim's work, and am linking him here to help drum up a little more business, as I know competition is tough on Fiverr.
Clean Lines / Shaded

Adding Color
With most of my concept designs, this is where I would stop. I like to add a sepia gradient and place the character against a piece of parchment for effect, but I've never gone any further...until now. If you're already skilled at Photoshop or digital art, this part may not provide much insight. But if you're new to the digital arena, or just want to try something new...keep reading to see how you can create a colored version of your concept art with minimal additional effort.
The concept behind this artistic technique is sound: focus on the values rather than the colors, and your design will be more detailed / appealing. Essentially, if you just color in line art, you spend so much time worrying about color tones and composition that you lose detail and your work doesn't get the attention it needs. So before proceeding, please ensure ALL shading is complete and your work has a good range of tonal values.

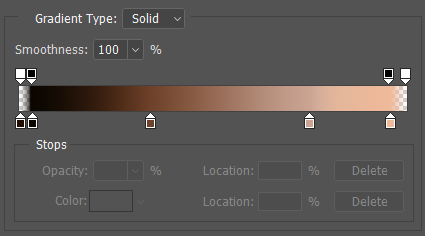
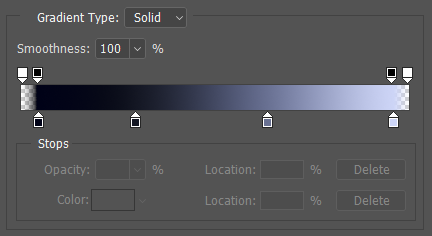
To begin, simply block out sections of your character, separating them into new layers. For Rae, I blocked out her skin, clothing, armor, cloak, hair, weapons, and accessories onto their own layers. Copy the underlying shaded components to these layers, then create gradient maps for each. Below are the maps I used for her skin and clothes...but make sure there's a different map for each layer.
Your Layers


By the time you've created all of your layers, you should have a nice 'stack' in your layers panel. Ensure that they're logically ordered - ie, Accessories are on top of armor, which is on top of clothes, which is on top of skin, etc.
With each layer, your character will take shape. The important things to remember are: don't leave any 'gray' shaded pieces, there's no limit to the number of layers, and you can always change the colors after the fact by adjusting your gradient sliders.
See the grid to the right of the building of Raelyn's gradient layers. You see with each one, she comes together, becoming more 'complete' with each step.
Yet even with the last layer, you'll see it's not done...certainly not anything you'd want to display to family or friends, let alone readers of your series. That's where the last step comes in...polishing and refining the lights and shadows.
Highlights and Shadows
You've built your layers, adjusted your gradients, but unless your initial sketch was perfect...there's still something missing. Your edges won't be defined, and some of the detail from the shading was lost in translation...and your character simply doesn't 'pop' like she's supposed to. That's where this last, all-important step comes in.

I actually created three layers on top of the gradients for adjustments, but could have gotten away with just two: highlights and shadows. Essentially, think of the shadows layer as the one that creates the refined edges of your character, forging the borders between the layers and bringing depth to her form. Conversely, the highlights layer does the opposite. Study your character and the way the light hits her, then go back over the lighter areas to add even more depth, and bring her to life!
Note: Highlights and shadows are not AND SHOULD NOT be lighter and darker points of the color wheel. For realism, add cooler tones for the shadows, and warmer tones for the highlights...or vice versa!
Here's a side-by-side comparison showing the last 'layers' image, and the addition of the highlights and shadows. Pretty significant, isn't it?


From top to bottom, every aspect has a little more definition, and a little more depth. The more you study the images, the more you'll start to notice. Suffice it to say, this is probably the most important step - and, probably takes the longest :). Remember, this is also a time you can make final adjustments to your colors by modifying your gradient layers. No recoloring...just subtle tweaking!
Raelyn's Composition
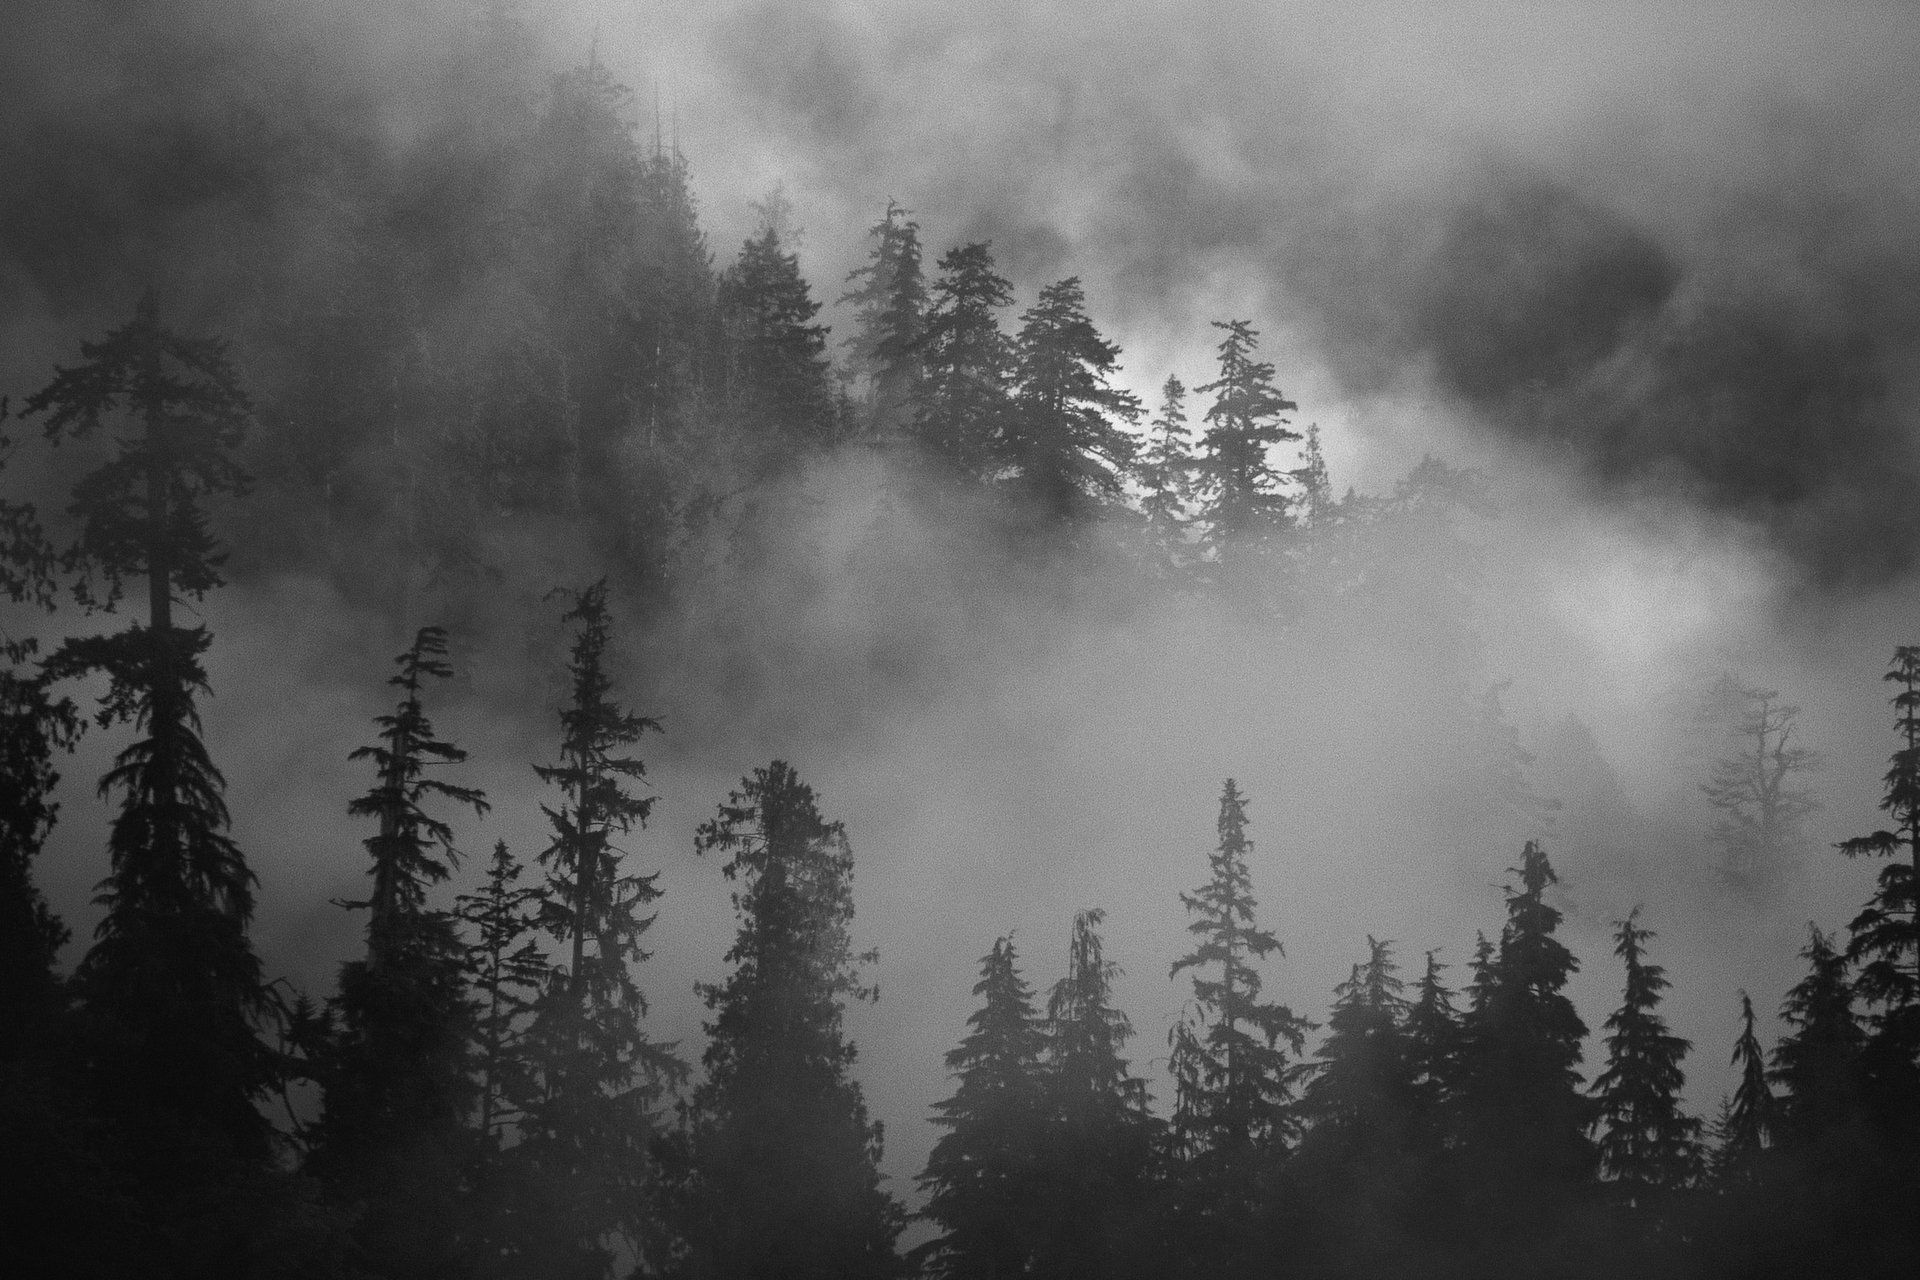
Okay, the hard part is over. You have a character you can use for production, marketing, or web banners. I wanted to take it one step further and make a 'scene' so to speak. All I did was found a metal frame and added subtle lighting effects to make it have a silver appearance. I then grabbed a stock photo of a moon and forest, adjusted their colors to match Rae (while blending into the background), then added one final layer to Rae to give her frame a rim light, bringing the moon into the composition.


I hope you enjoyed this quick introduction to one of my favorite characters. If you follow the series, you'll get to know Raelyn quite a bit. If you don't...that's okay too, but I do hope you're able to take something away from this and realize, even without a lot of artistic ability, you can take a character concept and turn it into something you can be proud of!
Bonus!

When the time came to create my cover for Kingdom of One, I submitted the concepts I wanted to appear on the cover. Among the assets was a Kurodai warrior as a shadowed silhouette. I sent her Raelyn's image as an example. She loved it so much, she wanted to use it on the cover! The lighting was changed to match the composition, but hiding in Ava's shadow is our favorite sentinel.
What do you think??
Look for Book Three of the Dragon-Touched season, coming soon. If you'd like to know more about the series as a whole, I invite you to check out take a tour of my site...and welcome to the mist!

I really enjoyed the character design post about Raelyn and how the artist thought through her look, outfit, and vibe before bringing her to life. It reminded me of when I was juggling so many assignments that I had to take an online nursing class late at night from US Online Class Taker while sketching characters just to keep my creative side alive. That made me think that mixing passion with hard work can keep you grounded and happy.